Advanced Section: LoRAs, Samplers, Comprehensive Tagging and Prompting, Advanced Syntax, and More
This is the part I'm dreading. I have so much to write about and even more stuff I feel like I'm forgetting. This part can be messy and not extremely detailed as I'm explaining my experience and "feels" on how certain things work or impact your generation. I can be very wrong on some aspects and completely misunderstand others, so if you see anything that you disagree with or it doesn't make sense, tell me. This part will be loosely sorted, refer to the Table of Contents to find stuff you want. Here we go.
Preamble
So, let's talk about the extent of stuff I'm going to talk about here. While some things are universal to SD and Illustrious, I don't think I'll be able to completely avoid stuff specific to, say, Forge, or some extensions/functions I rely on personally. Some things may not apply to your specific frontend or, especially, model. This guide was first written a little while ago, a lot of stuff happened. Most of it covers my experience using Forge, but later, I mostly talk about ComfyUI and newer Illustrious 1.0/1.1/2.0 models. Just see the descriptions under example images below.
Prompt Order
Let's start with basics. again. Ideally, your prompt order should be: <Quality Tags?>, <People Tags>, <Character Tags?>, <Action Tags>, <Appearance Tags>, <Background Tags>, <Composition Tags>, <Style/Artist Tags?>, <Quality Tags?>. It's not a strict requirement, but it has its own huge advantages. Besides keeping stuff organised, we're positioning more important stuff closer to the beginning, and the closer a prompt is to the beginning, the harder the model will adhere to it. "Adhere" here is not really similar to stuff like LLMs, for example. Here, it's more like "what will the model consider more important". Very roughly speaking, we want the model to focus on a detailed and correct character first, then assign specifics to them, and only then it will start figuring out the background and style. Of course, models do all of that simultaneously, like how it positions the character correctly according to Composition Tags, but there's still an order of More Important to Less Important. Another huge reason is preventing concepts from separating into different CLIPs when you're not intending to do it (we'll talk about them when it comes to Syntax). Since we're here, let's touch on Quality tags.
Quality tags; Do we need them?
Quality tags have been a staple of image genning since the earliest days. Adding masterpiece to prompts is almost a reflex at this point, but it's, first, a bit different with Illustrious, and, second, has it's own drawbacks. Let's start with a bit of philosophy. SD 1.0, then SD 1.5, and now SDXL always had a collection of images in the Training Data that represent either good quality, best quality, masterpiece, bad quality, worst quality, etc. Even the newest checkpoints inherit some of them; that's why these tags work, because Danbooru (from where Illustrious gets almost all training data) does not have it's own quality tags. A lot of Training Data associated with these quality tags is outdated and, well, does not fit the anime/drawing style we all are trying to get here; that's the first reason I argue for abandoning Positive Quality tags completely.
The second reason is, when we use these Positive Quality tags, we're needlessly increasing the complexity of prompt and generation with, well, Training Data of unknown quality/stylistic match with what we're trying to get, plus these tags take space that could've been used for stuff that's actually improving our image stylistically or with details/actions/etc. Okay, you get it, I don't like Positive Quality tags. What about Negative Quality tags? That's a completely separate case. When we negative worst quality, bad quality, we're not missing out on anything; it's a separate CLIP that doesn't increase the Prompt Complexity, and it doesn't make available Training Data that we want slimmer: it's just using shitty images to show the model how NOT to do. Even with that, there is stuff you should be aware of.
First, a lot of recommended Quality Tags you may find on different models' pages are, in fact, unnecessary and may make your experience much worse. Take, for example, sketch that's almost unanimously suggested as a Negative tag on almost all models. At first you may think, "well, I don't want shitty drawn images to be used as a data for my beautiful gens", and it's a rational thought; but if we take a look at these sketch images, we see that they're not "shitty", they just have a specific look and style to it that can be the exact thing you're looking for. Keep in mind that this sketch training data will be just a fraction of the overall data used for making your gen; it comes from all the other tags, like 1girl, outdoors, character tags, style tags, etc. You can think of it as, the overall look and "style" of your generation tries to reach a median value of all the different styles used for all regular tags in your image, and style tags like sketch just move it one way or another a little and do not define the overwhelming look of the image, if it makes sense.
TL;DR: be thoughtful of what tags you're using for your image, even if everybody else is using them. Think of why exactly you want this or that tag, experiment and see what gives you the best result.
UPD: This section is still relevant, but is somewhat less achievable with new Illustrious 1.0/1.1/2.0 models. They are overtrained and know too much, so you have to narrow down their scope by using Quality Tags.
Quality tags; Compilation
There are a few Quality Tags combinations I can suggest:
-
Positive: None. Negative:
worst quality, worst detail, bad quality, simple background, sketch, censorThis one is my main Quality Prompt. It's lightweight and doesn't limit your options too much, but here are a few things you should know: One,simple backgroundin the negatives improves the quality of indoors and outdoors but completely prevents you from using "simple backgrounds" likewhite background,grey background, etc. It's pretty safe to use for most purposes, but keep it in mind if you decide to generate simpler backgrounds. Two,sketchin the negatives gives the images more of a "2.5D" look. It's great for when you want a more refined and clean style, but prevents some cool styles completely. See the previous section for more in-depth explanation. Three,censor. While you never want a censor in your NSFW gens, it's completely redundant in SFW gens, and I'm not a fan of redundancy. I usually take it out when genning SFW and put it back in NSFW gens. You can just have it always there and it won't impact your SFW gens much, but just know that it's there. To fight watermarks, addsignature, watermarkto your negatives (but avoid it if you can. You'll be cutting off a huge chunk of training data with them in the Negatives). -
Positive:
,masterpiece,best quality,amazing quality. Negative:bad quality,worst quality,worst detail,sketch,censor,A solid Quality Prompt that I use for all my model comparisons, just to include all regular SD users that do use Positive Quality tags. The only issue I have with it is Positive Quality prompt, which I already explained in the previous section. Overall, a completely solid prompt. -
Positive:
,masterpiece, best quality, amazing quality, very aesthetic, absurdres, newest,. Negative:,lowres, (worst quality, bad quality:1.2), bad anatomy, sketch, jpeg artifacts, signature, watermark, old, oldest, censored, loli, bar_censor, (pregnant), chibi, simple background, conjoined, futanari,. I used to use this prompt a lot when I was still on NTR Mix, but now I see it as a bit overwhelming. It gives the image a pretty nice 2.5D look but can have a pretty big negative impact on detail and background quality. In my opinion, a lot of tags here are redundant and unnecessary in most cases. This prompt tries to be a catch-all, but I appreciate the reverse approach much more. -
No quality/negative tags. With each new release, their role kinda gets less and less important, and with some styles, they just hurt your gens. How I suggest doing is, just gen. If you see something you want to remove from the gen, and you can't do it with positive prompting, add it to the negatives. Besides that, I recommend
no pupilsin your negatives; it's extremely useful almost in every gen. -
Positive:
,masterpiece, detailed_eyes, high_quality, best_quality, highres, absurdres, 8kNegative:,poorly_detailed, jpeg_artifacts, worst_quality, bad_quality, no pupils. This is my current main Quality Style. I used to not use them at all, yes, but then new Illustrious 1.0/1.1/2.0 models came, which are overtrained and require you to narrow down the stuff they "know" for the gens to look good. This combination of tags is somewhat a compromise for me: of course, it inflates CLIPs, but it also doesn't prevent you from certain styles or anything like that.
Negative Prompting: How and When
Since we're on topic of Negative prompting, let's dive a bit deeper. While Positive prompting is somewhat straightforward: you just prompt for what you want to see, it doesn't work exactly like this with Negatives. You can't always go "Hm, I don't want to see this, let's Negative it"; you shouldn't, at least. Negative-ing is extremely powerful; it's basically purging all training data based a particular tag, which can result in "collateral damage" to training data you would want to see. Instead, you should do your best to find a solution based on Positive prompts; to a degree, of course. If you solve it in a tag or two - great, there's no need to add Negative prompts. If it requires more effort, or, which happens often, there's no Positive prompt you can add to solve the problem, then yes, adding negatives is worth it. They're not something to be scared of; a tag or two or five generally won't result in quality loss, but it depends. As it would happen often going on, you should always evaluate how many images a particular tag has on Booru. You should avoid negative-ing a tag that has 100k+ images, to a degree.
As the first example, let's imagine that we're generating a picture of a girl with green eyes. Even with ADetailer, models may want to turn the whole eye into a sea of green color, without pupils. There's no tag for black pupil, so there's nothing left to do but negative no pupils, and it indeed solves the issue completely.
As an opposite example, let's imagine generating an image of 1girl. It happens pretty often that when you generate an image of a single person, a copy of theirs appears somewhere in the background, especially if the background is complex. You may try to solve this by negative-ing 2girls, 3girls, multiple girls, but it just won't work. Instead, you should positive solo; that's it, the issue is completely gone. Same applies to nudity tags: it's easier and much more "gentle" to use topless, no panties, no bra, etc instead of Negative-ing shirt, panties, bra. On the same topic;
Tags
Tags; Evaluating if You Should Use a Specific Tag
Not all tags are born equal. While there are some necessary tags that always work, like 1girl, indoors or blonde hair, others may result in messy images or not work at all. Why does it happen? The reason is, some tags are just less populated than others. For example, a tag called grabbing own ankles does exist, but it only has 23 images on Danbooru, which means that using it is practically meaningless. More populated tags that count a few hundred images may work, but they may look messy, be impossible to influence or just won't work, overwhelmed by other more populated tags. A safe area for general tags starts at 1k+ images, with them working close to perfectly at 2k-3k population of images. It's a bit more difficult with characters and styles: they must have at least 2k population to even have a chance at working. Characters with 2k-ish images will often have wrong clothes, hair/eyes color, and will be completely messed up if you try to generate two characters in the same gen, for example. I'll touch on multiple character gens and how you can circumvent some of the issues later. Anyway, the moral is – always keep in mind how populated the tag you're adding is, and try to avoid tags with <1k images entirely (besides artist tags. They start working from 100+ images getting close to perfect at 500+)
Another thing is overtrained tags. Tags with 100k+ results can completely overwhelm others, even if they technically allow for another action. For example, let's take 1girl, arm up, arm behind back. Technically, these tags allow the other, but arm up is 5x more populated than arm behind back, so arm behind back may be ignored or inconsistent. You can avoid that by manipulating weight, like (arm up:0.4); more about it later.
Tags; How Including Redundant Tags Ruins Gens
Let's start with an example. We have a prompt, 1girl, 1boy, hug, sobbing, crying, streaming tears, head on chest, arms around waist, dress, medium breasts, covered nipples, green eyes, barefoot,pov. We aim for a POV image from 1boy's perspective where he's hugging a crying girl, but no matter what we do, we get either a non-POV image somewhere from the side; the guy hugging this girl with stretched hands (so it's not head on chest), or even a second boy appearing in the image; to put it simply — the result is completely different from what we prompted. What could be the issue? On the first glance, the prompt is completely fine. Before digging deeper, let's talk philosophy. Why are we even prompting for stuff? So that we could see it, of course. It's more true than ever for the AI model; if you prompted for something, the model will try it's hardest to include it. It pulls up all the training data corresponding to the stuff you prompted and uses it for the generation. Let's get back to our prompt. What we're actually expecting is an image of a girl in the POV's arms, burying her head in his chest, which means that it would be from above and/or height difference/size difference, and also means that we would be unable to see that she has covered nipples, green eyes,streaming tears, that she's barefoot or has medium breasts. When we prompt for something, the model will include it, going so far as to disregard other parts of the prompt. If something should not be seen on the image, do not prompt for it.
UPD: With newer models, this is less and less an issue. Models did learn to not generate stuff that shouldn't be visible, even if you asked for it. I think it doesn't make this section less relevant, this is still a nice practice, just FYI. Makes me wonder if it's models getting smarter, or prompt adherence getting worse across the board.
Tags; Tag Bleeding, and How To Avoid It
It's a fairly simple section, but it would be wrong not to include. Let's start with an example. We're prompting for 1girl, smirk, standing, against wall, green hair, ... ,. Huge chances are, we're going to not only get green hair, but also green eyes, dress, some accessory, or something green in the background. It's not only with hair, really, but with any mention of any color. The solution is fairly simple; we just specify specific concepts that got affected by the bleeding. If with green hair we also got green eyes, just prompt for blue eyes. The fact of multiple colors in the prompt lowers the chance of Color Tags bleeding by itself. Sadly, Color Tags bleeding is the simplest of bleeding tags. I cannot possibly account for every case of Tag Bleeding, but, in general, simply specifying the part that got affected by bleeding should be enough. I'll touch on it more when I get to Syntax, CLIPs and BREAKs.
Tags; How Tags Impact Seemingly Unrelated Things
As always, an example. We have a prompt, 1girl, lying, on bed, presenting, seductive smile, underwear,large breasts, ... ,. Here, we want to focus on the large breasts tag. The gen will look like an adult (in anime terms, at least) woman. If we swap this tag for small breasts or flat chest, we would notice that the character suddenly started looking much younger than before. This is an example of how tags affect unrelated things, in this case, it's the age. The reason is pretty obvious: a lot of images that have small breasts and flat chest tags are also loli and child images. Same for school uniform and petite, for example. In this specific case, we can solve this by adding loli, child into the Negatives, or adding mature female or stuff like milf if that's what you're going for (in this case, the solution using Negatives and Positive are both viable and used for completely separate things). This is just one example of this behavior. Another example would be using Character Tags. Some media have very distinct art-styles that will be brought into the gen; characters from stuff like Steins;Gate or OMORI will bring some of their style, and there's little to nothing you can do about them. The morale is, when you're thinking on what tags you should use, also keep in mind what kind of other aspects it can bring into your gen.
Tags; Rating Tags and How to Avoid (or Embrace) Horny
Rating Tags are extremely powerful instruments that... you will rarely use, really. You can see their exact definitions on the Rate Wiki, but in general: There are four rating tags, general, sensitive, questionable, explicit. First is no nudity or suggestive imagery, second is no nudity but with some suggestive stuff, third is no genital nudity (breasts are OK) and no sex, and fourth is genital nudity and/or sex and/or gore and/or other extremely graphic shit. You can use them accordingly, but they should have a purpose, as with everything. If you're going for a completely SFW gen but the model keeps throwing lewd shit at you, you can try using general, for example, and so on. One thing you should never do is negative one of them: they're some of the most populated tags in the training data, and negative-ing one of them will have a negative impact on the gen. With NSFW, there's really no need to use explicit or alike ever, as you can just specifically prompt for what you want.
UPD: I don't really want to delete this section, but as time goes on, I get more and more sure that you should absolutely never use these tags. It seems like a much more productive endeavour to target the specific issues you have, not relying on whatever negative-ing or positive-ing any of these tags will do. Will keep this thing for the sake of completeness I guess.
Tags; How Models Won't Do Anything Unless You Ask Them
An example. We have a prompt, 1girl, undressing, averting eyes, shy, blush,open shirt, ... ,. If we try to gen it, we would quickly find out that no matter how much we regen, the model will never generate nipples and will be extremely reluctant to even show breasts, despite open shirt seemingly implying it. That's where we get into the area of introducing concepts to the model. No matter how smart image gen model may seem, they still do not understand connections between things that are obvious to us. In the example above, to actually get a look at the tiddies, we have to specify; it's either breasts or some version with a size like large breasts, and nipples to actually see them. Without using both tags, the model would have almost never actually generated partial nudity we want. It's very similar with NSFW sex tags; with sex, you should always add stuff like nude if nude, penis and/or pussy if it's sex or other sexual activities. It's pretty similar to what I explained in Redundant Tags: you prompt what you see, exactly like you want to see it; but, just like in Redundant Tags, you should prompt only for necessary stuff. I'll explain Iterating gens a bit later.
Tags; Overloading Tags, or How to Get Visually Interesting Results
/// WIP ///
Tags; Conclusion
What I listed is in no way exhaustive, but I hope it got the point across: you should have a very specific way of Thinking with Tags™. You should evaluate what the tag you add will bring besides it's main function; how effective it would be; will it have negative impact on the gen; is this tag necessary to get what you want; and, most importantly, that you should experiment. Try stuff out, spend time tinkering with tags, fail over and over again to actually get what you want and learn something new. Try non-Booru tags, some of them do work (or so people say), combine tags, see how they interact — create. While image gen is not a real form of art, it's similar to one in how you use your creativity; just instead of drawing, you learn to combine things to get amazing results.
Prompt; CLIPs, and Why You Should Follow The Prompt Order
Let's talk about how your prompts are read by the model. I won't be technical at all as I have about 0 idea how it actually works, but there is practical stuff to know about. If you pay some attention, you may notice an indicator at the top right of both Positive Prompt and Negative prompt that says something like 0/75. This 75 is the token count that make a single CLIP. Roughly speaking, as you press "Generate", Stable Diffusion processes your prompt in chunks of 75 tokens. Once you exceed these 75 tokens, 75/75 transitions into 78/150 (for example), and another CLIP is created. CLIPs are processed separately and then combined. Usually, it's not something you have to worry too hard about. Even if you exceed the first CLIP, prompt from the CLIP still gets correctly applied to the gen.
Stuff suddenly gets more complicated once your prompt becomes complicated. For example, we have a prompt 1girl, ... , holding sword BREAK katana. Here, BREAK symbolizes a transition between CLIPs. If holding sword and katana were in a single CLIP, the model won't have a second thought that the sword that's being held is indeed katana. In a case where two tags are separated in different CLIPs, the model might get an idea that holding sword and katana are unrelated to each other, thus making a separate sword somewhere in the gen. While you won't (usually) get a catastrophic problem from CLIPs, it's a nice habit to follow the Prompt Order. Nothing bad will ever happen if artist or style tags are separated, same for backgrounds and composition tags. By following the Prompt Order, you make yourself safe from unnecessary issues you may get.
Addendum: On a related to the Prompt Order topic: how the tags are positioned in relation to each other is also important. While I can't find an exact rule on how this works yet; for example, in 2girls, girlA, girlB, holding sword, holding gun, the model will understand that it's one girl holding a gun, and another holding a sword. As you get to genning it, you will notice that, for example, 4/5 times it's girlA holding the sword and girl B holding the gun. By either moving girlA and girlB around, or the same with holding sword and holding gun, this behaviour will change. It doesn't always look like this, especially with more complicated prompts, but sometimes you might want to move the tags around to hopefully get a better/more appropriate result, even with simple 1girl gens.
While having an idea about CLIPs is not that important by itself, it's necessary to understand the BREAK separator; an extremely important and sometimes life-saving piece of SD syntax. We'll talk about BREAKs in detail later.
Syntax
Syntax; Introduction
We're all used to separating tags by , commas, but it's not the only piece of Stable Diffusion syntax there is. In fact, Stable Diffusion is extremely versatile in how you can manipulate your whole prompt, separate tags and even change the generation on the go. Before we actually get into it, a small warning. Most of the time, you don't need advanced syntax. It will only make stuff worse and needlessly complicated. If you don't want to spend time tuning precise settings and genning dozens or even hundreds of faulty generations, you shouldn't approach this. Most things can be done with good enough prompting anyway. However, there are some use cases where syntax is extremely useful, and a few situations where it's absolutely necessary.
IMPORTANT NOTE: When it will come to practical use and examples, most of what I'm talking about from here on out is empirical and can be extremely different from model to model. Some models are simply better at following your prompts and doing complex scenes than others. I can be wrong and make mistakes; some methods I describe are inconsistent, others got little to no practical use by me or literally have a single use-case. I'll try to be detailed, but there won't be a single solution for all of your problems. Keep that in mind.
Syntax; Separators
So, we all know and love the , comma. It is used to put distinguish parts of the prompt for the tokenizer. I honestly searched a lot for the use-cases of different separators, but, well, had 0 luck. I tried them, and, well, didn't see much of an impact. There is a situation where I do use them, but I'll get to it later. For the sake of completionism; Stable Diffusion supports the following separators (besides comma):
.Period. Some sites describe it as a "Hard Separator";Semicolon. The same sites describe it as a "Hard Separator" as well???!Exclamation Mark. Some sites claim that it's there to "convey a sense of emphasis"??????- Newline (just pressing enter). The only thing (besides a comma) that had some impact on the gen for me. You can try to use it to fight tag bleeding. Honestly, the only real advice I can give is; just stick to commas and try putting a newline if you need to fight the tag bleeding and nothing else helps.
Syntax; Prompt's Weight Manipulation
Just typing a tag is not the only thing you can do. You can also manipulate how powerful a tag (or LoRA) is in relation to other tags. There are a few ways to do that:
- Using brackets
( ). A pair of round brackets around a part of the prompt increases it's weight by 1.1. For example,no humans, city, cityscape, scenery, (lamppost). Here,(lamppost)has a strength of 1.1. You can combine these brackets, for example(((lamppost)))is a weight of1.1*1.1*1.1or1.1^3, which is1.33. - Using square brackets
[ ]. A pair of square brackets around a part of the prompt decreases it's weight by 1.1.[lamppost], for example, has a weight of 0.9.[[[lamppost]]]has weight of1 / 1.1 / 1.1 /1.1or1.1^-3, which is0.75. - Using a colon
:. With a colon, you can accurately define the weight of a tag. For example,(lamppost:0.5)has a strength of 0.5. This is a way I recommend sticking to. LoRAs follow a similar pattern; it will look something like this:<lora:lora_Name:0.5>, where:0.5is the strength. Be mindful of brackets that are a part of the prompt,horror_(style)for example. With a modified weight, it will look like(horror \(style\):0.5).
When should you resolve to this and how? In my opinion, it should be used to, A: Fight Tag Bleeding, and B: Fight Tags that are overwhelming other tags, like in the Evaluating if You Should Use a Specific Tag section. It's quite straightforward: you just lower the weight of the tag in question and see if it helps. It's mostly trial and error, and there are no fixed solutions for everything, so I leave it to you.
Syntax; BREAK is love, BREAK is life
It's a little bit difficult to approach this section, but let's start from understanding what it does. Let's have an example, no humans, building, house, dusk BREAK door, window, lamppost, bench,,. Here, I use BREAK to separate two parts of the prompt into different CLIPs, so that no humans, building, house, dusk (First CLIP) and door, window, lamppost, bench, (Second CLIP) are processed (somewhat) separately. In general, first CLIP is much more important than the second: image's composition is about 70% defined by the very first CLIP. What does it achieve?
UPD: FYI, ComfyUI does not have a support for BREAKs by default. You can either do it with Conditioning Concat, or use a custom node from comfyui-ppm, for example.
Multiple (Defined) Character Gens without Extensions
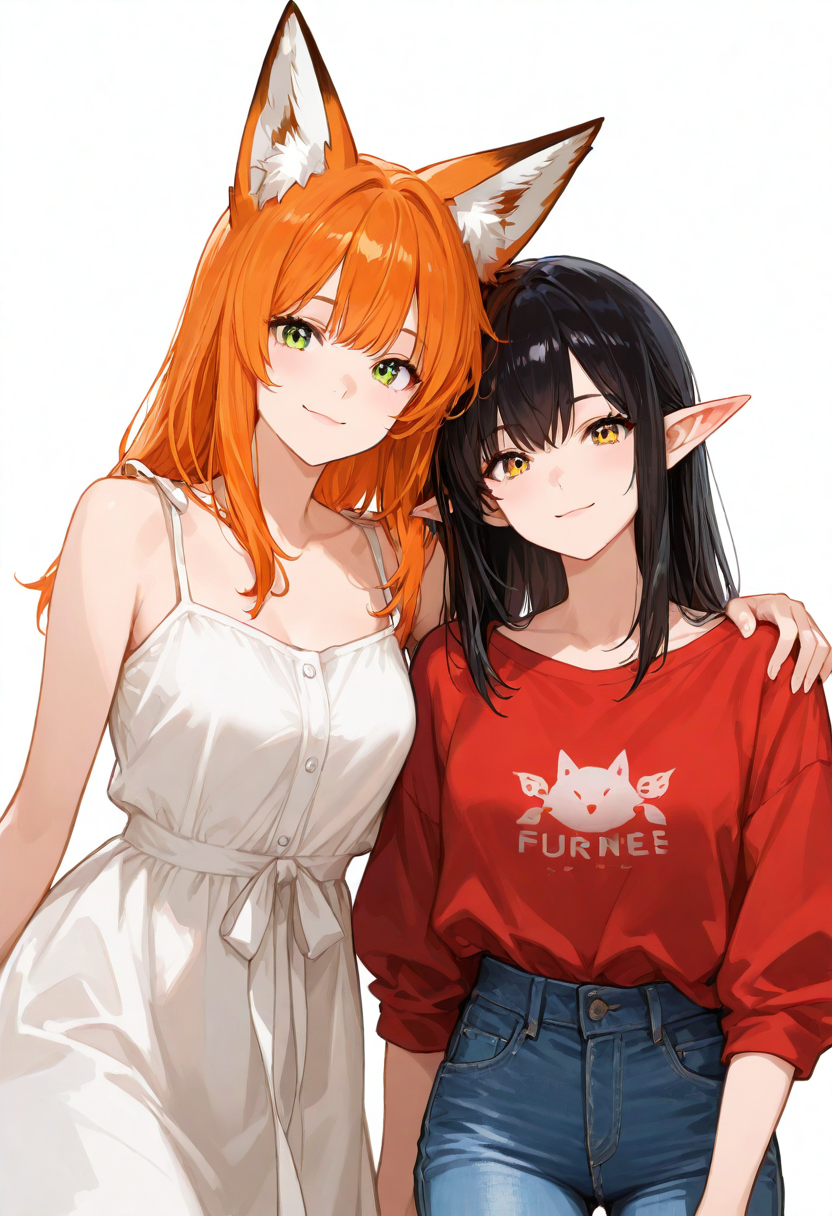
First, it's the most powerful way to fight Tag Bleeding, and second, it allows you to define different concepts/characters completely separately. For example, in a prompt like 2girls, looking at viewer, smile, side-by-side, hand on another's shoulder, red shirt, jeans, fox ears, orange hair, cowboy shot, white background BREAK black hair, sundress, pointy ears, it's the only way to get a satisfactory result.
What to note:
- Concepts applicable to the whole image must be in the first CLIP. In this case, it's
2girls, looking at viewer, side-by-side, hand on another's shoulder, cowboy shot, white background. - You must use an action that involves multiple characters. Here, it's
side-by-side, hand on another's shoulder. It'll be much harder to achieve anything meaningful without something to involve all characters. (note: it is possible to define the active participant by having the action tag in the corresponding character's part of the prompt. Here, it's 9/10 times the girl with fox ears doing the hug, and if we movehand on another's shoulderto the second CLIP, it will be an elf.) - Keep overprompting to absolute minimum. Here, an extra
animal earsto the first part of the prompt orelfto the second will ruin the gen. This is where manipulating weights will come very useful. - If you define anything appearance-wise with the first character, do the same to the other. Here, we defined that the girl with fox ears has
red shirt, jeans, orange hair,. It means that we also should define same things for our elf, so we addblack hair, sundressto the second CLIP. - Try to keep the image complexity low. If you can, avoid extremely defined backgrounds, difficult scenarios and such. Multiple character gens are already pushing image gen models to their absolute limits, so you have to be reasonable in what you want to achieve. Don't waste hours trying to get the impossible like I do sometimes.
- Do not expect it to work perfectly. Sometimes you get a 90% consistency, this prompt works about 50% of the time.
That's basically it for simple 2 character gens. With 3 characters, especially if the prompt gets more complex, we get into an almost esoteric territory, so I'll talk about separately later.
->
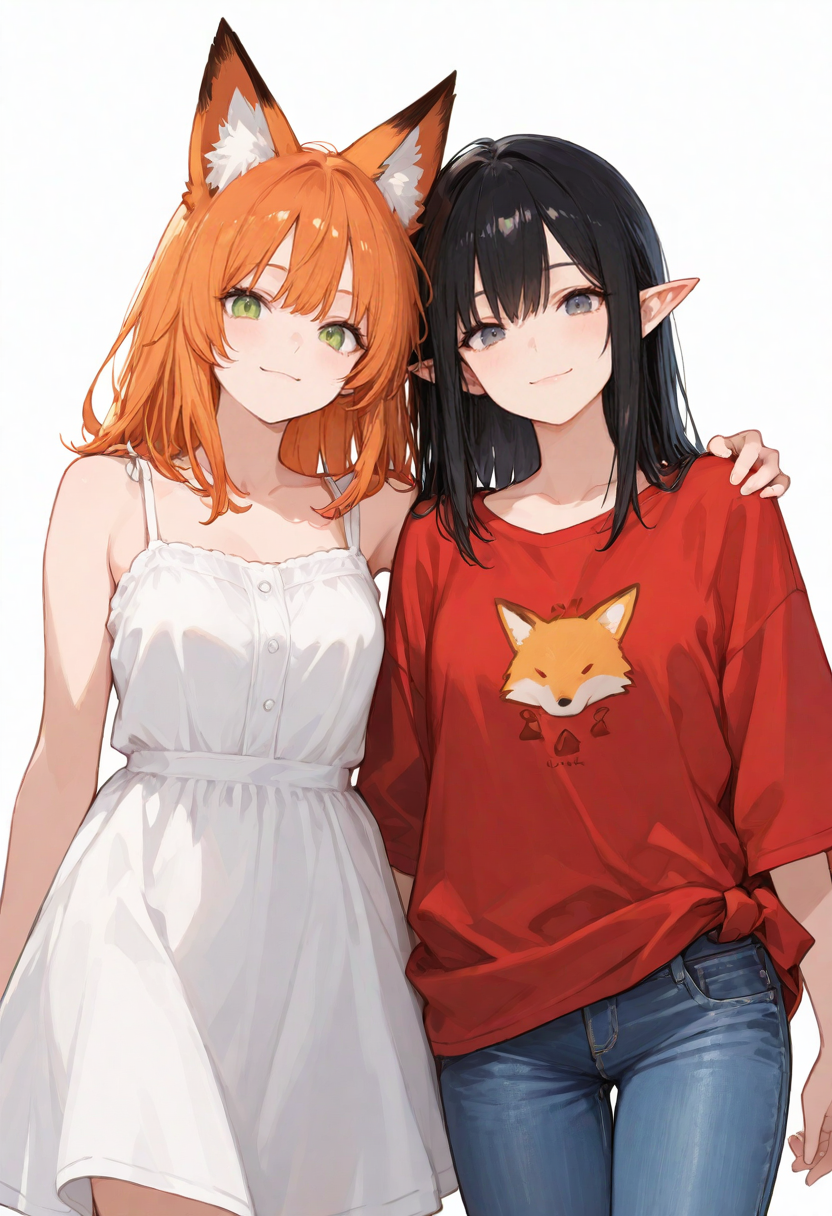 <-
-> Metadata: 2girls, looking at viewer, smile, side-by-side, hand on another's shoulder, red shirt, jeans, fox ears, orange hair, cowboy shot, white background BREAK black hair, sundress, pointy ears, Negative prompt: extra ears, worst quality, bad quality
Steps: 29, Sampler: DPM++ 2M, Schedule type: Karras, CFG scale: 5, Seed: 687164227, Size: 832x1216, Model hash: 0842c2a1d8, Model: Amanatsu_v11, Clip skip: 2, ADetailer model: face_yolov8n.pt <-
<-
-> Metadata: 2girls, looking at viewer, smile, side-by-side, hand on another's shoulder, red shirt, jeans, fox ears, orange hair, cowboy shot, white background BREAK black hair, sundress, pointy ears, Negative prompt: extra ears, worst quality, bad quality
Steps: 29, Sampler: DPM++ 2M, Schedule type: Karras, CFG scale: 5, Seed: 687164227, Size: 832x1216, Model hash: 0842c2a1d8, Model: Amanatsu_v11, Clip skip: 2, ADetailer model: face_yolov8n.pt <-
And another;
->  <-
-> Metadata: 1boy, looking at viewer, on couch, (spread arms:0.7), (spread legs:0.7), black hair, smirk, furry, wolf boy, loafers, indoors, suit jacket, open jacket, dress pants, straight-on, general
BREAK
3girls, (sitting on lap:1.2), sitting on person, elf, shy, maid, long hair, short hair, pink hair, white hair,
<-
-> Metadata: 1boy, looking at viewer, on couch, (spread arms:0.7), (spread legs:0.7), black hair, smirk, furry, wolf boy, loafers, indoors, suit jacket, open jacket, dress pants, straight-on, general
BREAK
3girls, (sitting on lap:1.2), sitting on person, elf, shy, maid, long hair, short hair, pink hair, white hair,
Yes, 3girls, this is deliberate. I will expand this section one day.
UPD 6 months later: I probably won't :)
Multiple (Non-Original) Character Gens
Stuff is significantly easier if you just use Character tags. For example, let's get a gen with these characters: stelle \(honkai: star rail\), belle \(zenless zone zero\), lumine \(genshin impact\). It follows the principles above with some slight alterations, so a few notes:
- With 2-character gens, you can pass without using BREAK at all. It would simply be
2girls, girlA, girlB, <Mutual Action Tags>, <etc...>, and it's enough. For separate actions, just use BREAKs, and keep the action inside the corresponding character's section. - If the model doesn't have enough training data about characters, it might start getting their features wrong or mess them up. In this case, it's BREAKs all over again; just specify messed up features for each character separately, inside their corresponding sections.
- You shouldn't mix up Non-Original characters with defined characters; it won't work 90% of the time. All the characters in your gen should be either Non-Original or Defined.
- In the gen below, I used a separate CLIP for actions. The reasoning is that I don't care which character performs what action, so anyone of them can do it. Using a separate CLIP for composition/style/misc tags is also very viable, I do it often.
->  <-
-> Metadata: 3girls, stelle (honkai: star rail), grey hair, yellow eyes, BREAK belle (zenless zone zero), blue hair, green eyes, BREAK lumine (genshin impact), blonde hair, yellow eyes, BREAK looking at viewer, arm around shoulder, w, looking at viewer, smile, wide shot, simple background,
<-
-> Metadata: 3girls, stelle (honkai: star rail), grey hair, yellow eyes, BREAK belle (zenless zone zero), blue hair, green eyes, BREAK lumine (genshin impact), blonde hair, yellow eyes, BREAK looking at viewer, arm around shoulder, w, looking at viewer, smile, wide shot, simple background,
Syntax; Prompt Merging, Delaying Prompts and Keeping the Quality with Styles
This section is exclusive to ForgeUI. ComfyUI does not support any of it by default.
Let's discuss some in-built Stable Diffusion scripts. One of the more useful is a Prompt Switch script that looks like this: [A:B:x], where A is the first prompt, B is a second prompt, and X is a fraction of total steps at which the switch occurs. For example, we have [pixel art:2000's \(style\):0.2]. The translation of it would be: First 20% of the gen, the active prompt is pixel art. At 20%, it's replaced with 2000's \(style\) and stays like this until the end. What it means in practice? The overall composition of the gen is almost completely defined by about 2-3 first steps (With Euler or DPM++ 2M. It can vary based on the Sampler and Scheduler). By using [A:B:x], we not only merge two styles into one, but also choose which style does the overall image composition; we're talking little details, the background, the look of the character, the quality of the image. This is where we can do another thing.
In [A:B:x], both A and B can be completely empty. Let's just not enter any A. We'll get: [:pixel art:0.2]. First, some theory. When you're using a Style Tag, an Artist Tar or a LoRA, it absolutely always has a negative impact on the gen's quality. With just a single Style or two styles at reduced weights, this impact is negligible. However, if an Artist or Style in question doesn't have enough images (<100 with Artists, <1k for Styles); or we start adding 3+ Styles/Artists/LoRAs, the gen's quality will get noticeably worse. One of the reasons is because the model will just have no idea how to make the image's composition with given Style Prompt. To spare the model from it, we can just have the Style Prompt disabled completely during the first few steps of the gen. With [:pixel art:0.2], it only kicks in once the composition is already completely finished, and all it does is what it's supposed to do: apply style to the gen. Note that 0.2 is an arbitrary number; you may want to test in range from 0.15 to 0.5.
Syntax; Prompt Addition
This section is exclusive to ForgeUI. ComfyUI does not support any of it by default.
When it comes to solo gens, you can also sometimes add one tag to the other. It's mostly unpredictable and there are often better ways to achieve stuff, but it's an option. For example red hair, blue hair has a chance of generating a hair color that's between red and blue. It can also generate a multi-colored hair, but it's easier to just specify for multicolored hair (+ you can pick a specific type of it from here) and have a prompt like red hair, blue hair, multicolored hair.
There is another way to specifically merge tags using | pipe. For example, (red hair|blue hair:1.0). What pipe does is, it switches from one prompt to the other each step. Whille it is a way to specific get a blend between A and B, it is unreliable. This is where we can return to [A:B:x]. For example, [red hair:blue hair:0.5]. This is a much more reliable and better way to achieve good merging. There are also other ways to use it, for example red hair, [:blue hair:0.2] and such, but I leave it to you.
LoRAs
LoRAs, or Low-Rank Adaptations, are a cheap and reliable way to impact the generation right on the model's technical level, basically finetuning it on the fly. I'm not the biggest LoRA enthusiast out there, so I'll be somewhat short.
First, with Illustrious, I suggest using LoRAs only for styles/detail. I tried a few, like, pose and "character appearance" LoRA, and, well, just using Booru tags seems like a better option both quality and versatility-wise. It's just my opinion though.
Second, do not use more than two style LoRAs at the same time, at least without making them skip first few steps. Without trickery, I recommend keeping the overall weight for two LoRAs below 1.1-1.3, for example, lora_A would have a weight of 0.7, and lora_B will have a weight of 0.4, making the total weight 1.1. These settings seem like they give the most style while keeping the quality basically the same as without LoRAs. Honestly, the very same goes for Style Tags. With Style Tags + LoRAs (that are applied like I suggested previously), a total of three seems stable. Just be mindful of weights.
That's mostly all I have to say. LoRAs can be of various quality and made for different purposes/models, so it's just trial and error. You just apply them, tinker with weights and see if the results are satisfactory.
Generation Parameters
Generation Parameters; Introduction
Congrats on making it this far (yes, I'm running out of ideas on how to begin sections). For most intents and purposes, you can simply setup your parameters once, never change them again and be happy. The following is parameters I consider to be stable and "good". Please keep in mind that I'll explore other parameters later, you may want to see them: - Sampler: DPM++ 2M Karras - Steps: 28 - CLIP Skip: 2 - CFG: 4 - Resolution: 832x1216 (or reverse), or 1024x1536 (if you're using a model based on Illustrious 1.0/1.1/2.0). And you kinda never have to change them, they are just good. But there are cases when you'd want to try something new and models that just won't take this.
For a much more detailed technical information on how samplers/schedulers works and how they're different, please check 11yu's Guide on Tech for AI Image Generation, it's much better than mine.
Generation Parameters; Align Your Steps, and Full-Quality Gens in Just 12 Steps
Available on most local frontends, there is a Scheduler called Align Your Steps, or AYS for short. AYS uses some ancient wizardry to make the gens in 10-12 steps that look the same as 28 steps Karras or Euler a. With parameters, I suggest using DPM++ 2M Sampler, regular Align Your Steps scheduler and from 10 to 12 steps. I don't think that AYS is negatively impacted by CFG, so I just keep it at 5 and go lower as needed.
-> 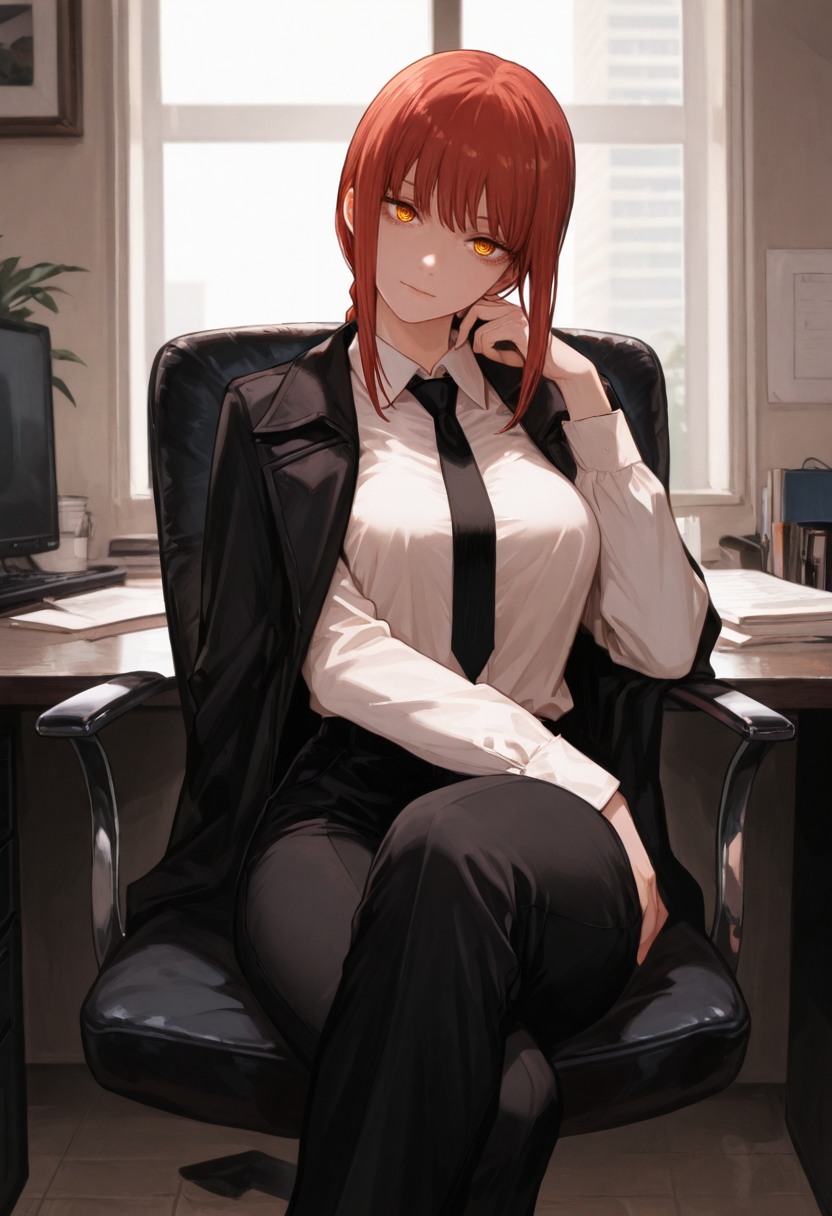 <-
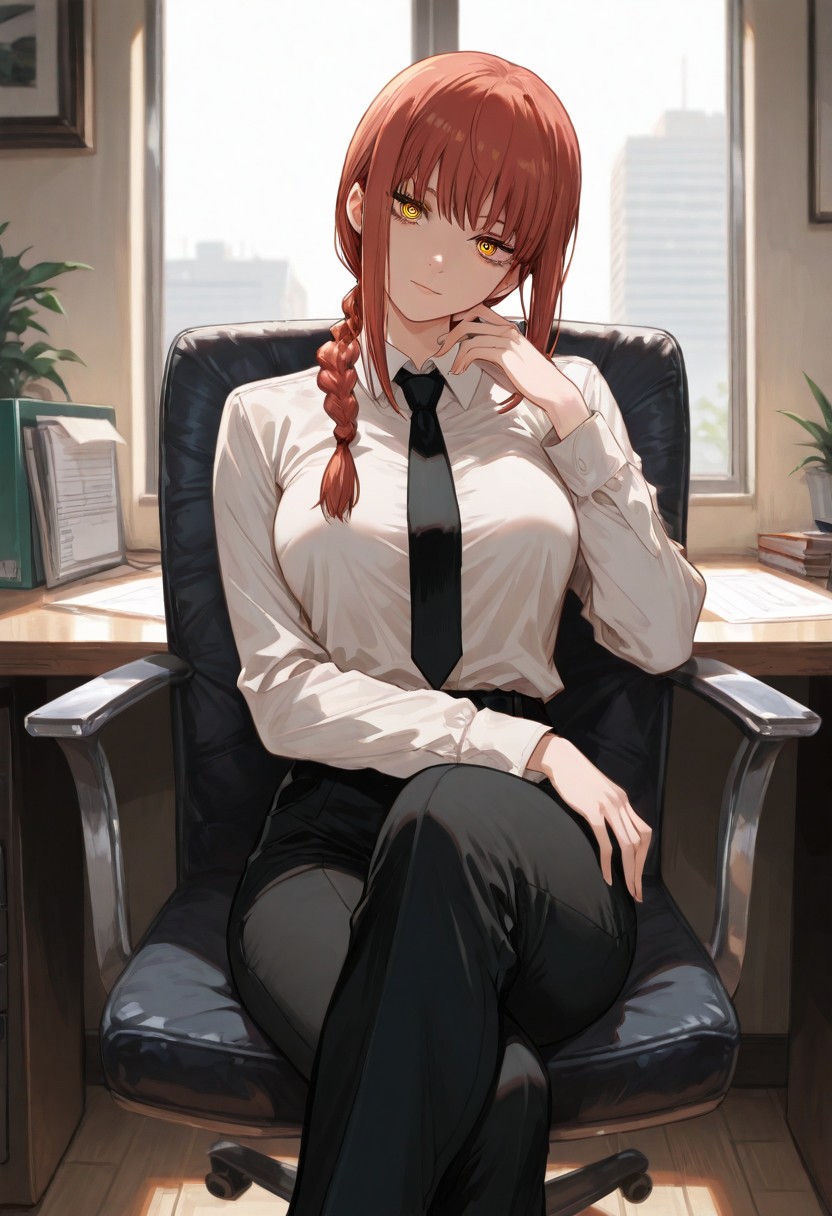
-> Metadata: 1girl, makima (chainsaw man), looking at viewer, sitting, crossed legs, on chair, head tilt, indoors, office, cowboy shot, masterpiece,best quality,amazing quality
Negative prompt: bad quality,worst quality,worst detail,sketch,censor
Steps: 12, Sampler: DPM++ 2M, Schedule type: Align Your Steps, CFG scale: 5, Seed: 3757563295, Size: 832x1216, Model hash: 0842c2a1d8, Model: Amanatsu_v11, Clip skip: 2, ADetailer model: face_yolov8n.pt <-
<-
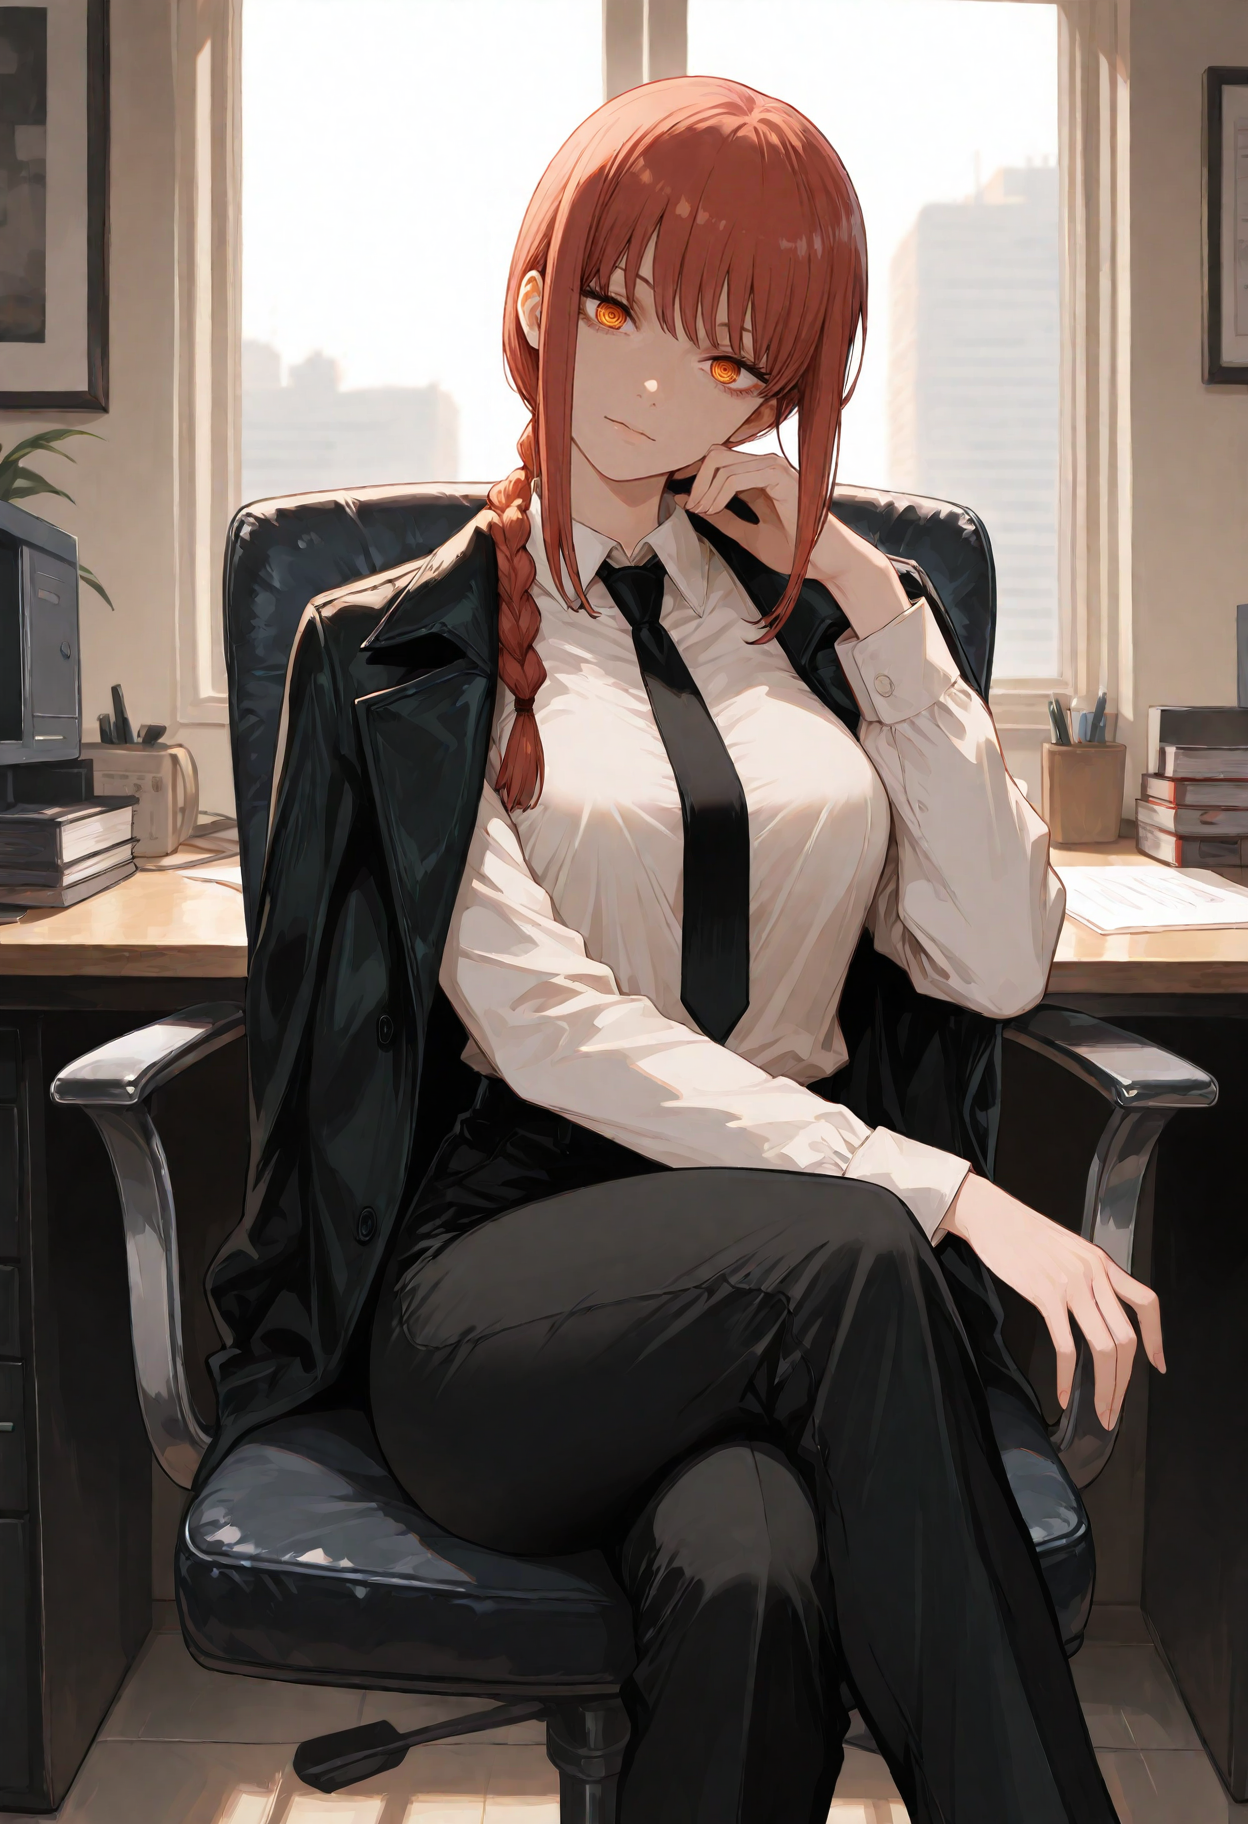
-> Metadata: 1girl, makima (chainsaw man), looking at viewer, sitting, crossed legs, on chair, head tilt, indoors, office, cowboy shot, masterpiece,best quality,amazing quality
Negative prompt: bad quality,worst quality,worst detail,sketch,censor
Steps: 12, Sampler: DPM++ 2M, Schedule type: Align Your Steps, CFG scale: 5, Seed: 3757563295, Size: 832x1216, Model hash: 0842c2a1d8, Model: Amanatsu_v11, Clip skip: 2, ADetailer model: face_yolov8n.pt <-
Keep in mind that while AYS is great for simple gens, it can start messing up as you increase the complexity of your gen. The most noticeable issue I had is AYS merging hands of multiple characters into a single blob. Besides that, AYS doesn't have any artifacts and looks incredible. It works with LoRAs, Styles and Artists with no issue. On my hardware (RTX 3070 8 GB), it lowers the generation time from 15-20 seconds with Karras and 28 steps to 9-10 seconds with AYS.
Generation Parameters; Extra-Quality Gens in 60 Steps
There are two notable Samplers that give you some beautiful gens without Hires and sometimes even replacing ADetailer. These are, DPM++ 3M SDE Exponential and IPNDM Automatic. Both require at least 40 steps, and I consider 60 steps to be a sweet spot, sometimes you may need up to 80. In my experience, IPNDM is better than DPM++ 3M SDE; IPNDM shows much less artifacting than DPM++ 3M SDE, which is understandable, given the nature of SDE (SDE adds some noise each step. More variety, less stability), but I still use it occasionally. In some cases, these two Samplers can even replace Hires, especially given that Hires is much slower. With some gens, faces without ADetailer look even better than with it, and it's especially mindblowing.
-> 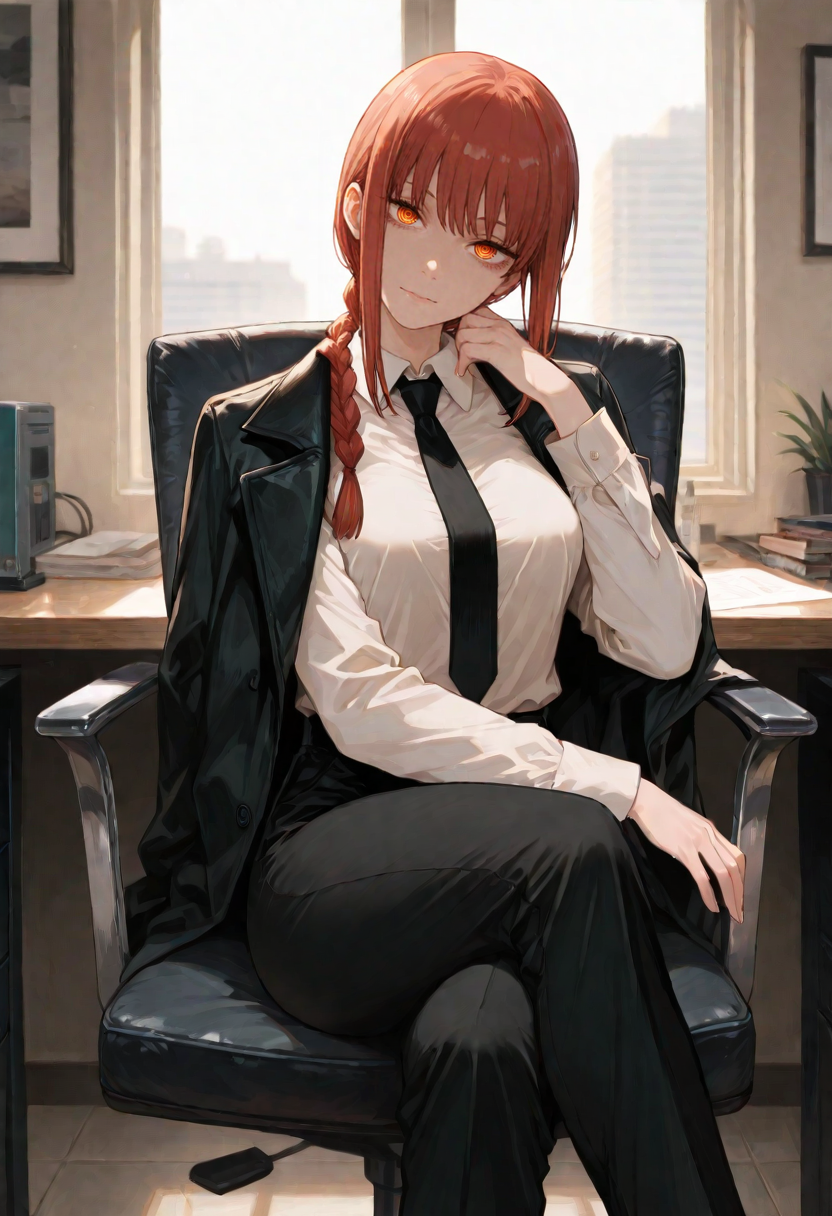 <-
-> Metadata: 1girl, makima (chainsaw man), looking at viewer, sitting, crossed legs, on chair, head tilt, indoors, office, cowboy shot, masterpiece,best quality,amazing quality, Negative prompt: bad quality,worst quality,worst detail,sketch,censor
Steps: 70, Sampler: IPNDM, Schedule type: Normal, CFG scale: 5, Seed: 3757563295, Size: 832x1216, Model hash: 0842c2a1d8, Model: Amanatsu_v11, Clip skip: 2, ADetailer model: face_yolov8n.pt <-
<-
-> Metadata: 1girl, makima (chainsaw man), looking at viewer, sitting, crossed legs, on chair, head tilt, indoors, office, cowboy shot, masterpiece,best quality,amazing quality, Negative prompt: bad quality,worst quality,worst detail,sketch,censor
Steps: 70, Sampler: IPNDM, Schedule type: Normal, CFG scale: 5, Seed: 3757563295, Size: 832x1216, Model hash: 0842c2a1d8, Model: Amanatsu_v11, Clip skip: 2, ADetailer model: face_yolov8n.pt <-
Generation Parameters; LCM, and Draft Gens in Just 5 Steps
Note that to use LCM, you must download it's LoRA and include it in the gen at weight 1. I suggest using LCM sampler with SGM Uniform scheduler. Your CFG must be in range from 1 to 1.5, I suggest the latter. LCM gives you perfectly fine gens extremely quickly, but they have significantly less detail than usual + there can be occasional artifacting.
->  <-
-> Metadata: 1girl, makima (chainsaw man), looking at viewer, sitting, crossed legs, on chair, head tilt, indoors, office, cowboy shot, masterpiece,best quality,amazing quality
<-
-> Metadata: 1girl, makima (chainsaw man), looking at viewer, sitting, crossed legs, on chair, head tilt, indoors, office, cowboy shot, masterpiece,best quality,amazing quality
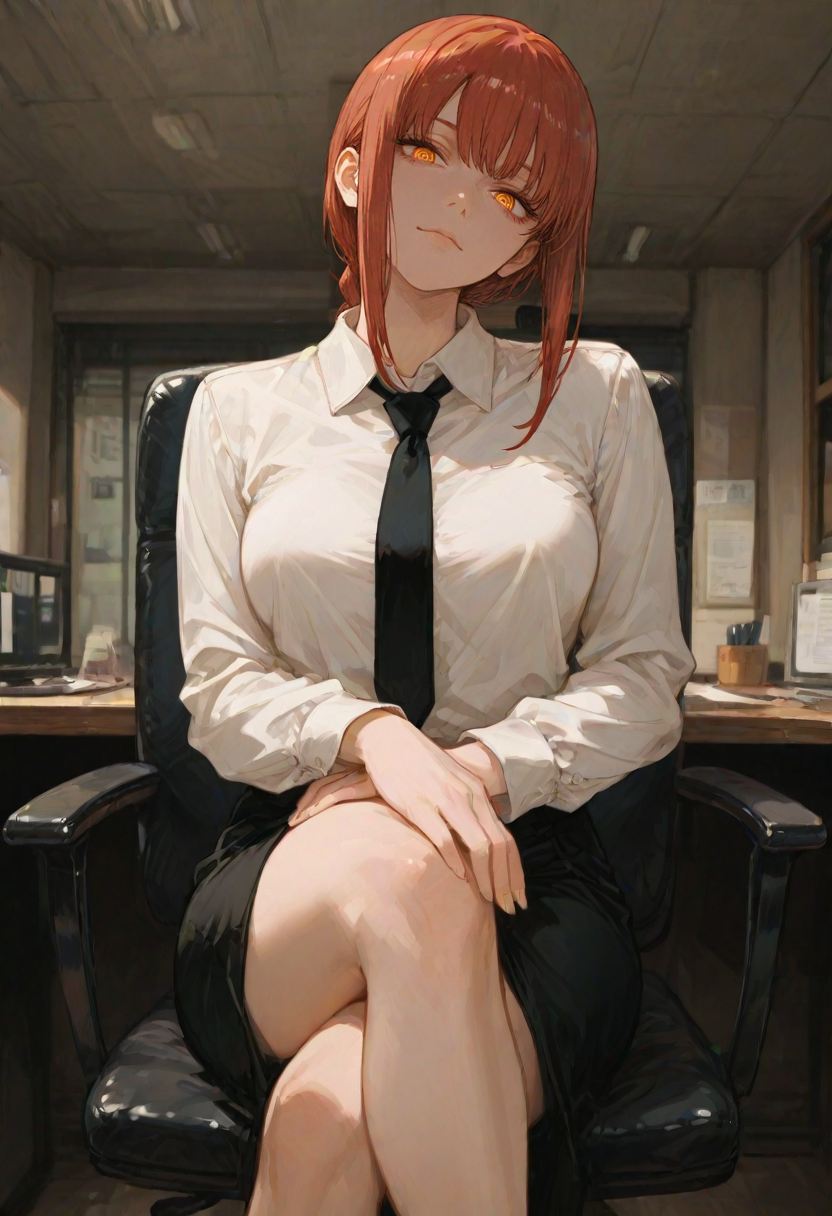
Generation Parameters; IPNDM_V and Quick(er) High-Quality Gens.
Found out about it recently, but it's just incredible. This sampler gives better quality at 40 steps than DPM++ 3M or regular IPNDM do at 80+ steps. First, make sure to use either Karras or Exponential schedulers. I recommend sticking to 40 steps, 30 is also viable, and technically you can go all the way down to 15 steps. Do not go above 40 steps; the image will get worse or break down.
->  <-
-> Metadata: 1girl, makima (chainsaw man), looking at viewer, sitting, crossed legs, on chair, head tilt, yellow eyes, indoors, office, cowboy shot, masterpiece,best quality,amazing quality
Negative prompt: no pupils,, worst quality, bad quality, simple background,
Steps: 40, Sampler: IPNDM_V, Schedule type: Karras, CFG scale: 5, Seed: 3757563295, Size: 832x1216, Model: Amanatsu_v11 <-
<-
-> Metadata: 1girl, makima (chainsaw man), looking at viewer, sitting, crossed legs, on chair, head tilt, yellow eyes, indoors, office, cowboy shot, masterpiece,best quality,amazing quality
Negative prompt: no pupils,, worst quality, bad quality, simple background,
Steps: 40, Sampler: IPNDM_V, Schedule type: Karras, CFG scale: 5, Seed: 3757563295, Size: 832x1216, Model: Amanatsu_v11 <-
And another; Note that it has no ADetailer;
-> <-
-> Metadata: 2girls, looking at viewer, smile, side-by-side, hand on another's shoulder, red shirt, jeans, fox ears, orange hair, cowboy shot, white background BREAK black hair, sundress, pointy ears
Negative prompt: no pupils,, worst quality, bad quality, simple background,
Steps: 40, Sampler: IPNDM_V, Schedule type: Karras, CFG scale: 5, Seed: 54443983, Size: 832x1216, Model: Amanatsu_v11 <-
<-
-> Metadata: 2girls, looking at viewer, smile, side-by-side, hand on another's shoulder, red shirt, jeans, fox ears, orange hair, cowboy shot, white background BREAK black hair, sundress, pointy ears
Negative prompt: no pupils,, worst quality, bad quality, simple background,
Steps: 40, Sampler: IPNDM_V, Schedule type: Karras, CFG scale: 5, Seed: 54443983, Size: 832x1216, Model: Amanatsu_v11 <-
Generation Parameters; DEIS, Another High-ish Quality Sampler.
DEIS is the High-Quality and relatively low-steps of IPNDM_V, but without it's downsides. It's incredibly stable and gives amazing results. Make sure to use it with SGM Uniform scheduler. I suggest 40 steps, but you can go up to 60 if needed. Comparing to IPNDM_V, they're about similar in quality; one is better in some aspects and worse in another, and vice-versa. It still gets you much more detail compared to DPM++ 2M/Euler a in just slightly more time, and it's more stable and reliable than IPNDM_V, so I can confidently recommend DEIS.
->  <-
-> Metadata: 1girl, standing, casting spell, magical weaving chaotic threads of white light coming out of hands, magic filling the area, outstretched arms, magic, fighting stance, white cloak, long hair, blonde hair, solo BREAK lens flare, chromatic aberration, diffraction spikes, fisheye, outdoors, night, embers, full body, dutch angle, (from side:0.4), (three quarter view:0.5), battle, war, army, soldier, fantasy
Negative prompt: worst quality, bad quality, simple background,
Steps: 40, Sampler: DEIS, Schedule type: SGM Uniform, CFG scale: 4.5, Seed: 1082317166, Size: 1536x1024, Model hash: 351447d6cd, Model: annnslmixillustrious_v31, ADetailer model: face_yolov8n.pt <-
<-
-> Metadata: 1girl, standing, casting spell, magical weaving chaotic threads of white light coming out of hands, magic filling the area, outstretched arms, magic, fighting stance, white cloak, long hair, blonde hair, solo BREAK lens flare, chromatic aberration, diffraction spikes, fisheye, outdoors, night, embers, full body, dutch angle, (from side:0.4), (three quarter view:0.5), battle, war, army, soldier, fantasy
Negative prompt: worst quality, bad quality, simple background,
Steps: 40, Sampler: DEIS, Schedule type: SGM Uniform, CFG scale: 4.5, Seed: 1082317166, Size: 1536x1024, Model hash: 351447d6cd, Model: annnslmixillustrious_v31, ADetailer model: face_yolov8n.pt <-
And another one;
->  <-
-> Metadata: 2girls, standing, outstretched arm, hand on another's hand, black shirt, brown skirt, long hair, baseball cap, white background, two-tone background, dual persona, human, from side, (full body:0.5), portal (object), BREAK 2girls, floating, midair, reaching towards another, looking at another, hand on another's hand, purple dress, darkness, dark background BREAK (chromatic aberration:1.2), (glitch:1.2), vhs artifacts, (digital dissolve:0.9),
Negative prompt: worst quality, bad quality, 3girls, 4girls, mirror,
Steps: 60, Sampler: DEIS, Schedule type: SGM Uniform, CFG scale: 4.5, Seed: 869983613, Size: 1536x1024, Model hash: 351447d6cd, Model: annnslmixillustrious_v31, ADetailer model: face_yolov8n.pt, ADetailer confidence: 0.3, ADetailer dilate erode: 4, ADetailer mask blur: 4, ADetailer denoising strength: 0.4, ADetailer inpaint only masked: True, ADetailer inpaint padding: 32, ADetailer model 2nd: hand_yolov8n.pt <-
<-
-> Metadata: 2girls, standing, outstretched arm, hand on another's hand, black shirt, brown skirt, long hair, baseball cap, white background, two-tone background, dual persona, human, from side, (full body:0.5), portal (object), BREAK 2girls, floating, midair, reaching towards another, looking at another, hand on another's hand, purple dress, darkness, dark background BREAK (chromatic aberration:1.2), (glitch:1.2), vhs artifacts, (digital dissolve:0.9),
Negative prompt: worst quality, bad quality, 3girls, 4girls, mirror,
Steps: 60, Sampler: DEIS, Schedule type: SGM Uniform, CFG scale: 4.5, Seed: 869983613, Size: 1536x1024, Model hash: 351447d6cd, Model: annnslmixillustrious_v31, ADetailer model: face_yolov8n.pt, ADetailer confidence: 0.3, ADetailer dilate erode: 4, ADetailer mask blur: 4, ADetailer denoising strength: 0.4, ADetailer inpaint only masked: True, ADetailer inpaint padding: 32, ADetailer model 2nd: hand_yolov8n.pt <-
Generation Parameters; CFG++, Pain and Incredible Gens (ComfyUI)
This section is only for ComfyUI, Forge doesn't have CFG++ samplers and reForge is dead + has a different implementation of it.
So, CFG++. The main principle behind it is that the sampler itself chooses an appropriate CFG scale. When it comes to practical usage, in general, you choose CFG two times lower than without CFG++; if you usually run CFG 4, use CFG 2 with CFG++; this is in theory. In practice, I suggest first trying CFG 1; if it's shit (it most likely will be), try going to CFG 1.5, and then increasing until you get a good image. CFG 1.5 - CFG 1.9 seem to be good values for me, but it can be different from model to model, and even gen to gen sometimes. As a CFG++ sampler, I suggest res_multistep_cfg_pp and euler_ancestral_cfg_pp, and either SGM Uniform or Karras as a scheduler. In my experience, using step count higher than 30 makes gens worse, so I recommend sticking to it and doing a Hires pass later if you want. In my eyes, it may be the best sampler we have; it straight up improved the quality of lighting, colors, and detail compared to the same CFG 3 gen of DPM++ 3M SDE at 60 steps. More after the image:
->  <-
<-
-> Generation Parameters: Positive: 1girl, kneeling, praying, magic, golden threads of magic, magic circle, magic symbols, blue hair, long hair, white coat, red eyes, elf, dark, indoors, church, light particles, three quarter view, full body, solo; Negative: no pupils, Sampler: res_multistep_cfg_pp, scheduler: SGM Uniform, Step Count: 30, CFG Scale: 1.8, Face Detailer, 1.5x Hires Pass, seed: 43, 1024 x 1536, checkpoint: Nova Orange v9.0. ComfyUI. <-
So, let's talk about practical usage in more detail. Main advantages of CFG++ are light contrast, colors and color contrast. With conventional samplers, when you try to go for a darker gen, you often get an image that's grey and still bright. Using some magic, CFG++ just solves the issue entirely. You (almost) get true black and incredible color contrast. The only issue with CFG++ is that it's very picky about your CFG scale, sometimes requiring you to set different values for different gens on the same model. You get something a little bit wrong, and you get an overexposed / oversaturated gen. Right now, I use this sampler for almost every model, it's just that good.


(I lost prompts for individual images, so no prompts. Sorry.)
Generation Parameters: Style Prompt: 2d, sketch, oekaki, limited palette, black background, Negatives: no pupils, loli, child, Sampler: res_multistep_ancestral_cfgpp, Scheduler: Karras, CFG Scale: 1.8, Steps: 30, Checkpoint: Nova Anime v7.0, Resolution: either 1536 x 1024 or 1024 x 1536. No Fixes, Hires or additional passes.
CFG++; Why you can't use it exclusively.
So, CFG++, especially with SDE/ancestral samplers is great, right? True blacks, color and lighting contrasts, more vibrant images: it's perfect, right? Well, kinda yes, but not always. There are a few issues that can occur.
- Overexposure issues. An image is clearly overexposed, with extremely bright spots. Honestly, I think it's not an issue of CFG++ by itself, but it's the models. This issue is always there with V-preds; because of course it is, but even eps-pred Illustrious models can suffer with this (maybe because of huge fine-tuning with NoobAI).
- Issues with LoRAs. Here, I actually don't even have a theory on why. LoRAs can just start acting even more unpredictable than usual, sometimes even artifacting and absolutely always having a big (more than usual) negative impact on the gen's quality.
- Issues with styles. CFG++ and noise-adding samplers have no issue with doing distinct styles, like anime vs. 8-bit vs. flat colours vs. monochrome vs. sketch, etc; but if you try to achieve a more subtle style change, like making the usual anime style more "drawn" looking (not sketch), you will fail. This is most noticeable with models that have their own styles: using both CFG++ and noise-adding samplers will neutralise most this style, bringing it to a more "default" "2.5D Anime" style.
- Models' overtraining issues. I talk about it more down below, but this issue has a very noticeable impact on CFG++ and SDE/ancestral. Basically, with some models, you just can't use them. The images will have too much detail, gens will basically try to fit as many details as they can and fail miserably.
How to fix these issues? Uh... I don't know if you can. Well, there is a shitty compromise of "Switch to euler_ancestral_cfgpp", but this is exactly what it is: a compromise. Euler a is just a lower precision sampler, which means that by sampling generations less precisely, it avoids some of the issues; a lot of these problems come from the sampling going "Try generating some detail --> On the next step, fuck it up --> Continue fucking it up during the rest of the generation". Euler a just skips most of the "Try generating some detail" steps, thus making it more reliable. Playing around with CFG Scale and Schedulers won't hurt as well, but there is no universal fix. Sometimes, you might want to go back to DPM++ 2M, res_multistep, or even Euler or Euler a. Also worth keeping in mind that some models just don't work properly with SDE/ancestral samplers... it's a clusterfuck of overtrained models, and I blame NoobAI and Illustrious 1.0/1.1/2.0. This slight increase in quality and resolution wasn't worth fucking up everything else.
UPD: With more recent models, these are less and less of an issue, thank God.
Generation Parameters; Hires
Hires is an incredible feature to get higher resolution gens with increased detail. I suggest the following parameters (For ForgeUI. For Comfy, see the ComfyUI guide):
- Upscaler: R-ESRGAN 4x+ Anime6b OR Lanczos
- Hires Steps: 20-22
- Denoising Strength: 0.35 - 0.39
- Upscale by: 1.5 - 2.0
->  <-
-> Metadata: 1girl, makima (chainsaw man), looking at viewer, sitting, crossed legs, on chair, head tilt, indoors, office, cowboy shot, masterpiece,best quality,amazing quality, Negative prompt: bad quality,worst quality,worst detail,sketch,censor
Steps: 28, Sampler: DPM++ 2M, Schedule type: Karras, CFG scale: 5, Seed: 3757563295, Size: 832x1216, Model hash: 0842c2a1d8, Model: Amanatsu_v11, Denoising strength: 0.39, Clip skip: 2, ADetailer model: face_yolov8n.pt, Hires CFG Scale: 5, Hires upscale: 1.5, Hires steps: 20, Hires upscaler: R-ESRGAN 4x+ Anime6B <-
<-
-> Metadata: 1girl, makima (chainsaw man), looking at viewer, sitting, crossed legs, on chair, head tilt, indoors, office, cowboy shot, masterpiece,best quality,amazing quality, Negative prompt: bad quality,worst quality,worst detail,sketch,censor
Steps: 28, Sampler: DPM++ 2M, Schedule type: Karras, CFG scale: 5, Seed: 3757563295, Size: 832x1216, Model hash: 0842c2a1d8, Model: Amanatsu_v11, Denoising strength: 0.39, Clip skip: 2, ADetailer model: face_yolov8n.pt, Hires CFG Scale: 5, Hires upscale: 1.5, Hires steps: 20, Hires upscaler: R-ESRGAN 4x+ Anime6B <-
Generation Parameters; Refiner
Refiner means that the first x fraction of steps is done by one model, and then it's replaced with another model. It's trial and error, so there's not that much to talk about. One thing I want to note is, remember that the overall composition of the image is done by the first model, not the refiner model. You can have the first model to 2-4 steps and then switch to another model; as a result, the image's composition is done by model A and the whole style is done by model B.
Prompting; Iterating on Your Gens
This part is more of a philosophical view on how you should do prompting. I like to call it Iterative Prompting. The main point is, you start from drafting the overall image, and then focus on each part of the image, following the Prompt Order. You refine each part of the prompt, generate the image, reflect on the result and keep refining the prompt until you get the image you want consistently, after that you enable all the resource-intensive stuff like Hires or High-Steps Samplers and play with styles. Let's have a big example.
- I come up with an overall idea of the gen. Let's start with an idea: a creepy/dangerous punk girl in a darker style. After some thinking, I come up with this prompt:
1girl, looking at viewer, head tilt, raised eyebrow, smirk, holding cane, red jacket, open jacket, long hair, multicolored hair, dark, darkness, city, high contrast,and gen. - I look at the gens. While
high contrastdefinitely gives an interesting look, the overall image is too dark.smirkis also not optimal, her expression is really weird in a bad way. Besides this, her overall look is pretty close to what I wanted, so I also need to add Composition tags. Reflecting on this, I edit the prompt,1girl, looking at viewer, head tilt, raised eyebrow, (smirk:0.5), (grin:0.5), holding cane, red jacket, open jacket, long hair, multicolored hair, dark, darkness, city, (high contrast:0.7), cowboy shot, close-up,and generate it. - I'm already quite happy with the image, but I have some other ideas I want to try. I'd like to have more character focus, so I remove background tags. I also want even less dark image, so I lower the weight of
dark. New prompt is:1girl, looking at viewer, head tilt, raised eyebrow, (smirk:0.5), (grin:0.5), holding cane, cane, red jacket, open jacket, long hair, multicolored hair, (dark:0.5), darkness, (high contrast:0.7), cowboy shot, close-up,. Time to gen - First, she's tilting her head too much. Second, to make her more visually interesting, I add
hererochromia, then specify two hair colors and rely on Tag Bleeding to also do eye colors. To add more to the composition, some slightdutch angle. Prompt turned into:1girl, looking at viewer, (head tilt:0.7), (smirk:0.5), (grin:0.5), holding cane, cane, red jacket, open jacket, heterochromia, long hair, white hair, red hair, multicolored hair, (dark:0.5), darkness, (high contrast:0.7), cowboy shot, close-up, (dutch angle:0.3),and I gen it. - At this point, I feel pretty happy about the result, so I start adding style and LoRAs, as well as doing some minor edits. New prompt:
1girl, looking at viewer, (head tilt:0.7), (smirk:0.5), (grin:0.5), holding cane, cane, red jacket, open jacket, heterochromia, ringed eyes, long hair, white hair, red hair, multicolored hair, (cowboy shot:0.7), close-up, (dutch angle:0.3), traditional media, <lora:illustrious_quality_modifiers_masterpieces_v1:0.7> <lora:illustriousXL_stabilizer_v1.72:0.35> - Not specifying backgrounds and having
simple backgroundin the negatives really ruined the gen, so I fix it:1girl, looking at viewer, (head tilt:0.7), (smirk:0.5), (grin:0.5), holding cane, cane, red jacket, open jacket, heterochromia, ringed eyes, long hair, white hair, red hair, multicolored hair, dark background, (cowboy shot:0.7), close-up, (dutch angle:0.3), traditional media, <lora:illustrious_quality_modifiers_masterpieces_v1:0.7> <lora:illustriousXL_stabilizer_v1.72:0.35> - Now I feel completely happy. I take the seed of my favourite gen and reuse it, this time with Hires. Woila, we're done.
->
 <-
-> Metadata: 1girl, looking at viewer, (head tilt:0.7), (smirk:0.5), (grin:0.5), holding cane, cane, red jacket, open jacket, heterochromia, ringed eyes, long hair, white hair, red hair, multicolored hair, dark background, (cowboy shot:0.7), close-up, (dutch angle:0.3), traditional media,
<-
-> Metadata: 1girl, looking at viewer, (head tilt:0.7), (smirk:0.5), (grin:0.5), holding cane, cane, red jacket, open jacket, heterochromia, ringed eyes, long hair, white hair, red hair, multicolored hair, dark background, (cowboy shot:0.7), close-up, (dutch angle:0.3), traditional media,
From start to finish, this generation took 50 images to refine the first prompt into the last. This is the way I do all my gens, and I highly recommend following the same principle. It's extremely easy to mess up at the very beginning and spend hours trying to fix it; I've been there.
Prompting; Prompt Complexity
This is a quite ephemeral thing that I think is extremely important. I consider Prompt Complexity to be this: it's the amount of separate concepts you require the model to understand and generate correctly. Things like Styles are not separate specific concepts, so they're not increasing the complexity. Appearance tags on solo gens have no other interpretation than, well, that they're worn by this character, so it's also not an issue. Things start getting fun once you start doing complicated stuff. Asking for two separate actions by a single character relies on the model understanding how it's going to look, so it increases the complexity a lot. Defining two separate characters makes the complexity skyrocket: the model has to associate different characteristic (that are technically applicable to both characters) to separate characters. It's fine if you assign actions that require multiple characters, but stuff like black hair, pointy ears, animal ears can be assigned to either, and the model will most often just make both characters like this. Resulting from this, Prompt Complexity is a sum of every Tag Bleeding, Redundant Tags, Overtrained and Undertrained Tags, as well as ambiguous tags. The less complex your prompt is, the more consistency and quality you get. You should always look for opportunities to make your prompt simpler, to use a more specific (but still populated) tag, replace multiple tags with just one, avoid redundancy and bleeding. It's a nice habit that may save hours of work.
New Illustrious 1.0/1.1/2.0-Based Models
So, there are finally models based on new Illustrious 1.0/1.1 that don't suck ass, and I finally got to try them. You can find a comparison of a few of them in my thread on Aegiscord. They're pretty good, and because of their support of higher resolutions and Natural Language, I use them quite often. Let's talk about it in more detail. You can see examples of them in the DEIS section.
Higher Resolutions; While Illustrious 1.0/1.1-based models supports a variety of 1536 x 1536 resolutions, I suggest sticking to two: 1024 x 1536 or 1536 x 1024; they show the most prompt adherence and overall quality. Higher resolution helps immensely in face quality, small/subtle details, and detail in general. Keep in mind that while these higher resolutions are more than usable, prompt adherence of them is worse than with regular SDXL sizes. You can always use good old 832 x 1216, 1216 x 832, 1024 x 1024, etc.
Natural Language Prompting; While tags remain the main way of prompting, you can finally add in some Natural Language for more complicated prompts. For example, in the magical girl image I used as an example for DEIS above, I used magical weaving chaotic threads of white light coming out of hands, and it worked almost perfectly. As anything related to Natural Language, there can't be no guidelines or specific rules for usage, so all I can suggest is experimenting; but I'd advise that if you can do a specific thing you want with Tags, you should do just that. Natural Language is unpredictable, and I think it should be used only if there's no other way.
Impressions: I'm not ready to speak definitively on them right now, but I've made my impressions on them. Compared to Illustrious 0.1, Illustrious 1.0/1.1 based models show much more creativity if you prompt for it, and they can easily do extremely complex gens that 0.1 would've struggled with. 1.0/1.1 is not fool proofed in any way, and complex gens still take a lot of knowledge and understanding of how tag, prompt and gen, but Natural Language and improved creativity makes the job noticeably easier. I'm not ready to abandon Amanatsu completely, but AnnnslMix specifically is really good. Stuff like this makes me excited for what's to come.
UPD: Illustrious 2.0. So, we finally got good Illustrious 2.0 models, like Nova Orange and Nova Anime. First, they seem to really hate regular samplers, like DPM++ 2M and regular Euler. From my testing, these models require you to use a sampler that does noise injection, so it's samplers that have Ancestral or SDE in them. I got the best results using Euler ancestral and res_multistep_ancestral. Besides that, they really like CFG++ samplers, so I recommend using res_multistep_ancestral_cfgpp with CFG at about 1.5 - 1.7 in Comfy. Second, they're now much more coherent at higher resolutions, sometimes showing just better results there compared to regular stuff like 832 x 1216. Note that it results in higher VRAM usage; with my RTX 3070 8 GB, I usually reach about 7.0 - 7.5 GB usage. Third, I don't see any improvements in Natural Language compared to Illustrious 1.0/1.1; you can try your luck using them, but it's preffered to stick to tags if you can. Fourth, from my testing, Illustrious 2.0 models show much better prompt adherence and understanding; you can combine more difficult tags, sometimes ditch the "Prompt for what you want to see" principle and other creative stuff; you are not as likely to ruin your gen as before. I suspect recent Illustrious 2.0-based models to be heavily overtrained, but it's something to be researched.
UPD 2: The issues I describe here are less and less severe with recent models.
The Issue of Modern Overtrained Models.
Hi, it's been a while. Lately, when testing new models, usually those based on (or including) Illustrious 2.0, I see new issues that weren't there before, when Illustrious 0.1 was prevalent. More precise samplers like DPM++ 2M, DEIS, IPNDM_V, RES Multistep and such fail completely, you have to use increasingly lower CFG values, higher step counts making images worse (higher in, 30 steps is fine, and 40 is suddenly much worse, when it used to be fine), etc. My running theory is that the reason for all of this is model overtraining. I don't have concrete numbers here, so it's mostly speculation, but it makes total sense. So, with Illustrious 0.1, models usually had about 5 million images in the training dataset, and most of them were real art, stolen from creators on Danbooru. It started changing quickly when Noob came out, containing ~15 million images in the dataset, 3x more than Illustrious 0.1, and it was obvious: while Noob understands artists and tags very well, you are almost required to use an artist tag to get an alright results, or the image will turn out to be mediocre at best. It was relatively fine for us Illustrious users for a little while after that, but when Illustrious 1.0/1.1 came out, both it and Noob started to get aggressively merged, inflating the dataset of most models to these ~15 million across the board, getting to the current situation of, one, overbloated models that have much more images in the dataset than they should have; and two, most training data for Illustrious 1.0/1.1/2.0 is AI-Generated, not real imagery, which obviously reinforces slop in already flawed models.
Of course, it's not an issue with every modern model. LunarCherryMix and ProjectIl, for example, almost feel fine; but most other models got much worse. It's nice to have the advantages of Illustrious 2.0 I describe above, but the drawbacks are very inconvenient. If you suspect that you're using an overtrained model, I recommend doing the following:
- Stick to
Euler ancestral. Overtrained models hate precise samplers, andEuleris often the only choice left for them. - Use
ancestral/SDEmodels. Introducing noise each step makes the models behave better. - Use lower CFG scale. CFG 3 should be your maximum, you can also try CFG
2.0. For CFG++, I recommend CFG 1.5 - CFG 2.0. - Use heavier Quality Tags/Artist Tags. The issue with overtrained models is that, they know too much and can't pick what to stick to. By making their pick narrower, you help them understand what to do. Usually, I'm completely against unnecessary tags, but this is where you legit need them.
UPD: Saying for the third time now, but these are less of an issue right now.
V-Pred Models; How to Use
While I won't be going into deail about how V-Pred models are different from eps-pred, there are some differences in how you should approach them. In general, if you see that a model you're using is a v-pred (or there are unexpected artifacts/noise in the image), you should know:
- DPM++ 2M Karras and some other samplers/schedulers do not work.
- DPM++ 2M SGM Uniform, Euler a Normal, DEIS SGM Uniform and IPNDM_V SGM Uniform are my recommended samplers.
- I highly recommend using a CFG++ sampler, like res_multistep_cfgpp.
- Avoid using dark, day and other tags that change the lighting. While v-pred is famous for it's great color range and lighting, it's extremely prone to over-exposing gens or making them too dark.
- Be ready for instabilities and jank. I personally do not like v-pred at all, and all models using it (that I tested) sucked. You can get these advantages of v-pred on regular eps-pred models with some prompting (to some extent), like contrast, hdr, vibrant, shadow, dark, reflection, and lighting tags.